It wasn’t too long ago when I could watch TV just by pressing the power button on a the set’s remote. Today I need to turn on the power, lower the projector screen, set the input to the cable box or streaming box, and decide what device should process the audio.
I think the JamesGames system has at least 10 different remotes, including: TV, Soundbar, receiver, cable box, DVD changer, DVD player, BlueRay player, Xbox, FireTV, electric blinds, light switches, and motorized projection screen.
I wanted a solution that could integrate all of those settings in a single command, controllable with a single press of a button.
For that, I turned to the Harmony system from Logitech, and I’m truly impressed. With it I was able to retire a dozen remotes and control a very complex AV setup with just my smartphone. I want to share with you the steps I took, which might be of use to you in planning your own system.
How it Works
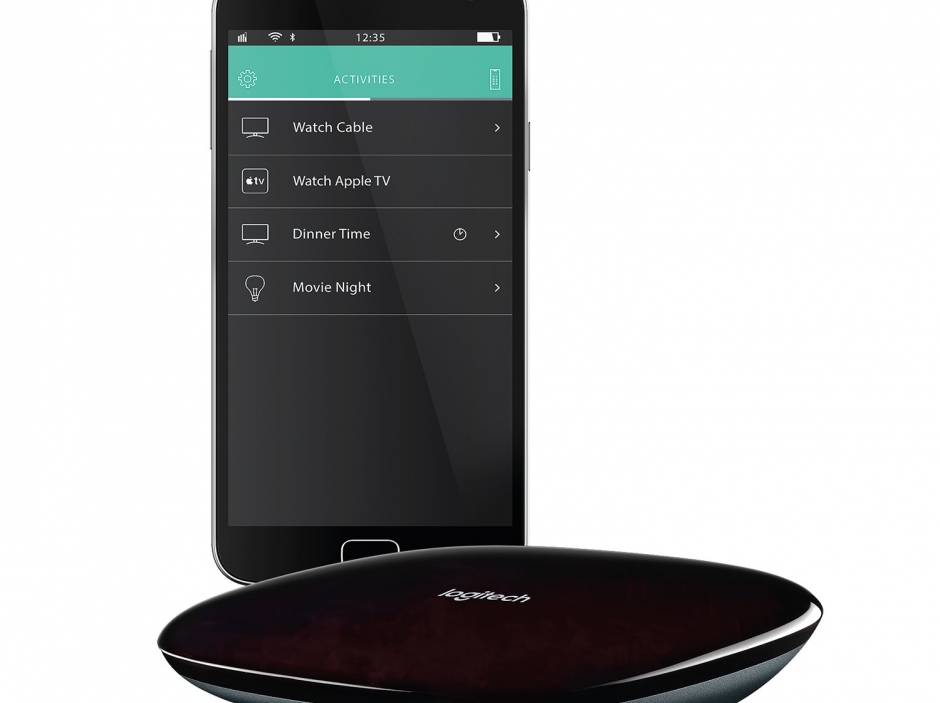
The most basic Harmony product consists of a programmable, wireless (save for the power cord) hub that is used to broadcast the infrared (IR) signal to control your devices. You can control the hub with your tablet or smartphone, or (in more expensive models) with a dedicated remote.
There are pros and cons to using the dedicated remote. The dedicated buttons and “always ready” status of the remote mean you don’t have to fumble for your phone and get into the app to turn down the volume. On the other hand, the remote is another thing that has to be plugged into power, and might not fit your room’s aesthetic. If you have an iPad or tablet handy, I think it may provide the best, easiest to read, control device for the Harmony.
After downloading the Harmony app, you connect the harmony hub to your Wi-Fi network. It is a pretty painless operation so long as you know the name of your network and its password. (This might be a deal breaker for my mom and dad, but I’m sure you know them without calling me.)
Next, you tell the app what devices you want to control, supplying the brand and model number. Logitech has created a database with the remote codes for thousands of devices, so in most cases once you’ve entered your devices and set up activities, you’re all done. If your device is not found you can enter a learning mode to teach Harmony how to control it. I had to do this, for instance, for my motorized screen. Somehow Harmony had a listing for the device, but didn’t have the commands to raise or lower it! Strange, but correctable in less than five minutes.
Finally, you create “activities” in the app, such as “Watch TV” or “Play a DVD”, by telling Harmony which devices you use in each activity. The app even suggests certain activities to setup and what devices you probably want to add. For instance, it knows that if you want to watch a DVD you’ll need to control your TV and a player. If you also want to control a receiver or the lights, you may need to add those.
Regardless of the model, you should know that Harmony only controls devices that use IR signals, not RF (radio frequency), or certain devices that can be controlled by WiFi (like my Roku and blinds). This is fine for most situations as IR is typically used in TVs and players. Conversely, if your device requires that you point your remote at it to control it, then it is probably RF, and is not controllable by the Harmony system.
It follows from the use of IR that you need to have line of sight between the IR signal of the harmony hub to your devices. This can be a significant limitation if you want to control a device inside a cabinet or hidden behind a piece of furniture. The solution is to use extension emitters, essentially infrared bulbs on a cord that you can place outside of the cabinet. My hub came with one extension cable and has ports for one more. As detailed below, I was able to use splitters to actually get even more emitters working.
A source of confusion is that there is a Harmony RF extender that can be used where you can not set up a line of sight between the hub and a device. Essentially, it shoots a radio signal across the room that does not require line-of-sight, which is then converted back to an IR signal. However, this device does not give control over third-party RF devices, it merely shuttles the IR signal between two places.
Planning
Because the system is so powerful (and can control so many devices) it is essential to do some planning before starting the actual installation.
I created a paper grid that had a row for each activity I would be controlling. Across the rows I created columns for each device. Then, I filled in the grid, noting the settings fro each device relevant to the activity.
This planning step is much better than just winging it. It makes things so much easier when you try to input the info into the Harmony app if you have it all in one place. It also makes it easier to previsualize where you're going to need the Harmony signal emitters before you've laid down any cable.
In my case the location of the emitters was problematic. Most of the equipment is located in a cabinet, but then there was also the equipment at the front of the room: the screen, projector, and a sound bar. The cabinet needed at least two emitters, one for each side of the case. In practice three emitters would be even better, because I wasn't able to find a a position because of the shelving where two could control all the devices unless one of the doors were open.
But then there was the equipment on the other end of the room. As it turned out, these devices were not picking up the signal from the emitters in the cabinet.
The problem is that the Harmony Hub only has two emitter extension ports. I knew I needed at least three more. A little bit of Googling led me to a solution from Monoprice: a long throw of cabling with a splitter that gave each port twice the number of potential emitters. Fortunately, in my parts bin I found the emitters I needed, though others you can find them on line as well.
Giving the complex nature of the automation, not to mention the thousands of products the Harmony system needs to know how to control, the process of setting up the remote is remarkably easy. All of the devices I was setting up were found in the Harmony database, so I didn't need to go through the additional steps of having the system "learn" any controls.
The process is quite straightforward. First, you input the devices in your system by specifying the brand and then the model number. If you've gathered that up in your pre-planning, you can read it off your chart.
Next, you specify the activities you want to control, for example, "watch TV" or "watch a DVD". For each activity you first put a checkmark next to each device you need to control.
When I watch TV, for instance, I need to 1)turn on the projector 2)lower the screen, 3)set the input on the sound bar to HDMI 1 and, 4)set the input on the projector to HDMI 2. In the Harmony setup you select the devices first, and then the Harmony software asks you for the inputs.
In Practice
Once everything was setup it was time to test.
Using the system couldn’t be easier. From the home screen you select from one of the activities you’ve set up and Harmony runs the commands, and then displays one or more screens that have dedicated buttons to control the activity (like volume, channel buttons, and more).
If not everything worked as planned you press the question mark button at the bottom of the screen. It brings up a list of all the devices with the buttons to manually turn them on and set them to the correct inputs. In most cases, all you need to do is see what isn’t turned on and press the appropriate button. This screen can be used to both fix a problem and also diagnose what command isn’t working.
The first problem I ran into was that my projector requires two presses of the power button to turn off. The Harmony was only sending one. I tried to solve the problem on my own, but ultimately wrote to Customer Support. I received a fast response that they would fix the entry in the database. I was told to delete the projector from the device screen and reload it. Within 24 hours, that problem was resolved.
Another issue surfaced later, and it has been a bit trickier to take care of. It turns out that some TVs select their inputs directly: to choose "HDMI1", you just press a button on the remote and it goes to that item. Unfortunately, on my projector you select an input by first bringing up a menu that lists all the inputs, pressing the up/down buttons until the desired input is highlighted, and then pressing select. This creates no end of problems for Harmony because it doesn't "know" what input is selected at in the menu. Usually, this is not a problem; Most of the time Harmony does a good job of remembering what input was previously selected by it. However, if you manually make a change Harmony will get confused and next time it tries to change inputs you'll end up in the wrong place. I suspect that sometimes Harmony just gets confused even if you don't make any manual changes.
Frankly, this problem crops ups more frequently than I would like. It would make things much easier if pressing the "select input" option on the projector always defaulted to the top menu item, or better yet, if it had direct selection of inputs, but that is a "what if", and not much help in day to day use. In the meantime, I've learned how to help Harmony if it gets confused. More on that in the next article “Using The Harmony System: Tips and Tricks.”
Conclusion
I love the Harmony system. With a touch of a single button, being able to turn on the devices, set the lighting, and even lower the blinds, may seem like a fantasy out of a spy film from the sixties. It is even better in reality.