I've tried a number of Network Attached Devices (NAS) over the years with mixed results. Sometimes they have been nothing more than a disk hanging off a router, but I've also had several multi-disk smart enclosures.
The latest of these was a four disk enclosure from Seagate that I originally got with the idea of serving up media to the various devices throughout the house and as a central repository for photos. In practice, it turned into a backup device, because I found that streaming from it was too slow most of the time to serve up large photos and movies.
In theory, the multi-disk solution should have prevented any data loss if one of the drives went bad. However, last week two of the drives showed errors and all my data was gone. I've had enough troubles with backups over the years to have had multiple backups (to the point of seeming paranoid to some of my friends), but the belt-and-suspender approach sure felt good when multiple terabytes went up in smoke, particularly when Seagate support told me there was no fast way of determining whether it was the drives or the enclosure that had gone bad.
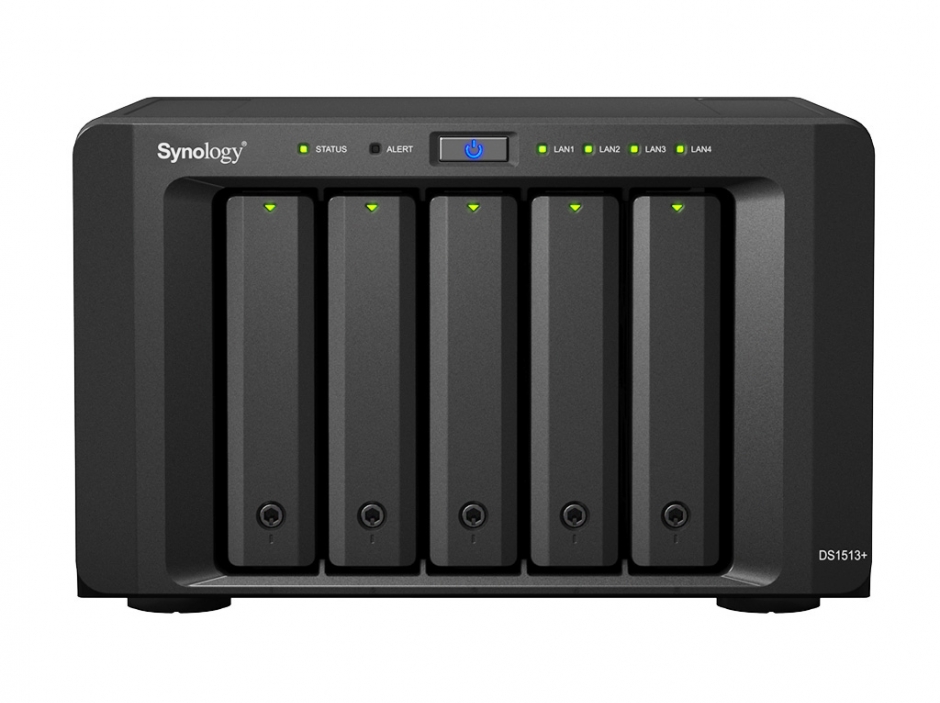
I decided that my next NAS should be large, fast, and be able to do more than just serve up files. That's why I turned to the Synology 1513+, and so far, I'm really impressed.
The base unit comes with a Dual Core 2.13 GHz Atom CPU, 2 GB of RAM and no hard drives. I upgraded, maxing out the RAM at 4 GB. Synology was very insistent that I only use their branded RAM, which I did.
Setting up the unit's hardware is fairly easy: Popping four drives into the bays didn't even require tools, though screws can be used to really lock drives into place.
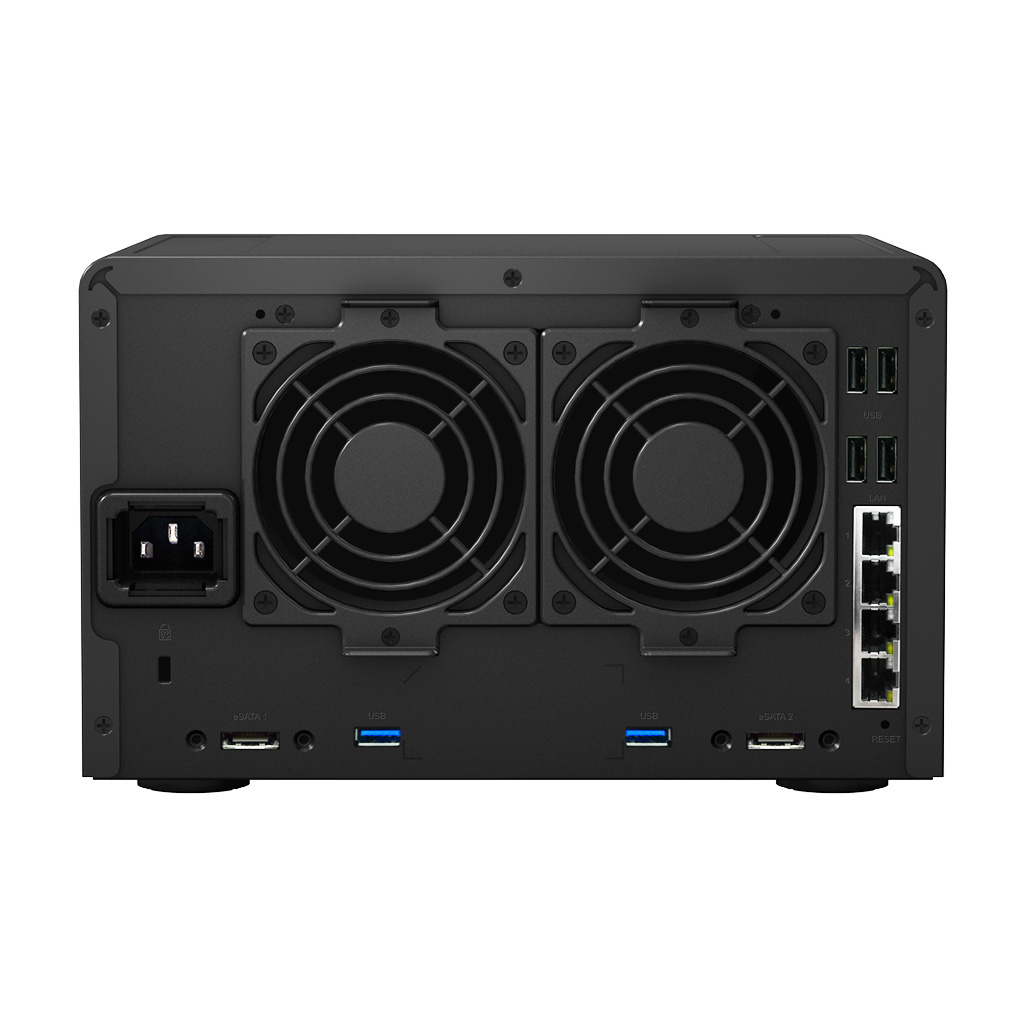
I plugged two ethernet cables from the unit into my router's 1GB ports, powered the NAS, and watched it purr.
You configure the device using a web interface. There are a lot of options, so it does take some time to figure things out.
The first choice involves deciding what kind of RAID to use for the hard disks. A variety of options for creating the disk volume are available, but in my case I opted to create a RAID using their proprietary format that provided dual-drive fault protection. In other words, I could lose two drives from my raid and it would keep on working. Obviously this really cut down on my capacity, effectively halving the amount of storage to about 7GB. Still, redundancy of backup is no vice if the data really counts. Once you make the selection the NAS starts building the volume, stitching together the multiple drives into as single logical disk. Unlike many NAS, you can start using the drive immediately. By comparison, the Seagate drive takes up to eighteen hours to be ready for use!
However, before I started moving files there was a lot of other work to be done. First, I created an account with Synology and registered the drive. This creates a dynamic link to the unit that allows outside users, if desired, to connect to the NAS even if you don't have a static address. Oddly, there are two ways to get into the NAS. You can use something called QuickConnect, or you can enable port forwarding through your router for more advanced functions (like running a full fledged website on the NAS).
I got some poor tech support from Synology while trying to sort out the different use scenarios for the two methods of logging in. One tech told me they were functionally equivalent, but the second tech correctly noted that some things can only be done with port forwarding.
Setting up port-forwarding was fairly straightforward. In the router administration screen you simply tell it to send all web traffic to the internal IP address of the NAS.
Synology has a FAQ on how to configure security on the NAS to make opening up some of the ports a bit less scary. I found that documentation to be well written.
After setting up users, security levels, and shares I downloaded various apps I wanted to run on the NAS. All downloads and configurations are done in the browser interface, a well designed UI. If an app is dependent on a setting or another app the interface guides you to install them.
I've set up a number of these and this was by far the easiest, most well thought out installation process I've had. For instance, enabling an Apache web server, database and MyPHPAdmin was essentially done by clicking on one checkbox and two icons. It took a bit longer to figure out how to change the passwords, but it was much easier than having to install from scratch. Pear, Webalizer, Perl and more are easily installed with the click of a button.
Within about an hour I had the webserver, ftp, security, and outside access all running.
From there it was just a matter of uploading media to the server. This is where the dual-core processor, multiple ports, and lots of memory came in handy. The unit is just blazing fast. Even transferring terabytes of files took hours instead of days.
I've still barely touched the surface of the options available. There is a built-in photo-sharing app and a photo-blog, or I can run Wordpress. Files can be backed up to the cloud or via the esata and USB 3 ports.
All in all, the Synology 1513+ is fast, powerful, and user friendly.